Skip to content
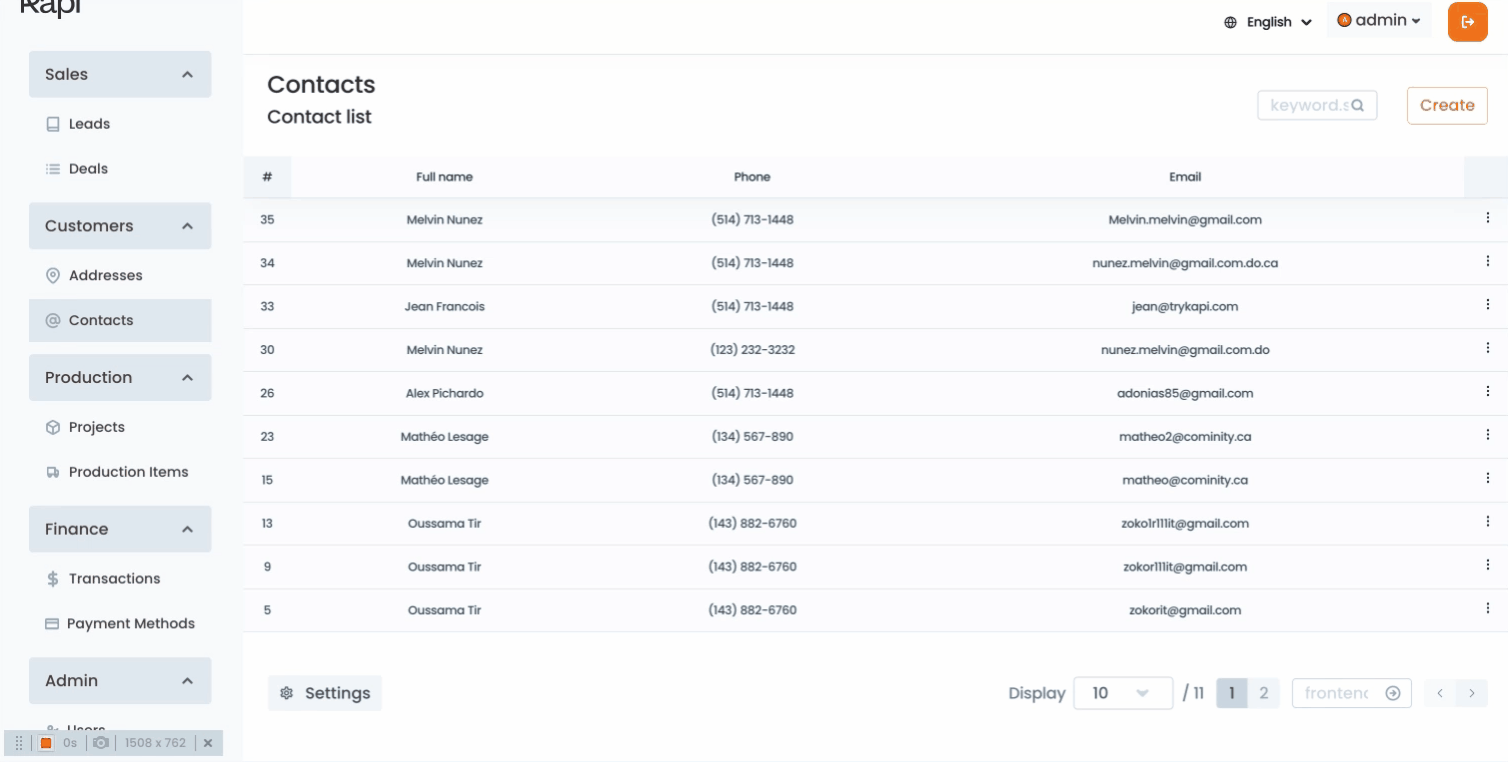
Click on the “Add contact” button located in the upper right corner. A drawer will be shown at the right pane of your screen. To create the new contact you should:Input the Contact’s general informations:First nameLast name *Email*The email should be in a valid format, meaning it must have a prefix followed by @, followed by a valid domain.The email should be unique, the system won’t allow you to use the same email for 2 contacts.Phone1: this field only accepts numbersPhone2: this field only accepts numbersDescription: Provide any description you would like for this contact.Birthday: a date picker that will allow you to select the customer birthday.After filling the form with the right information you can click on the “Add button”A new Contact will be createdYou will see a notification message indicating that the new contact has been created and there will be a button that will allow you to view the contact.
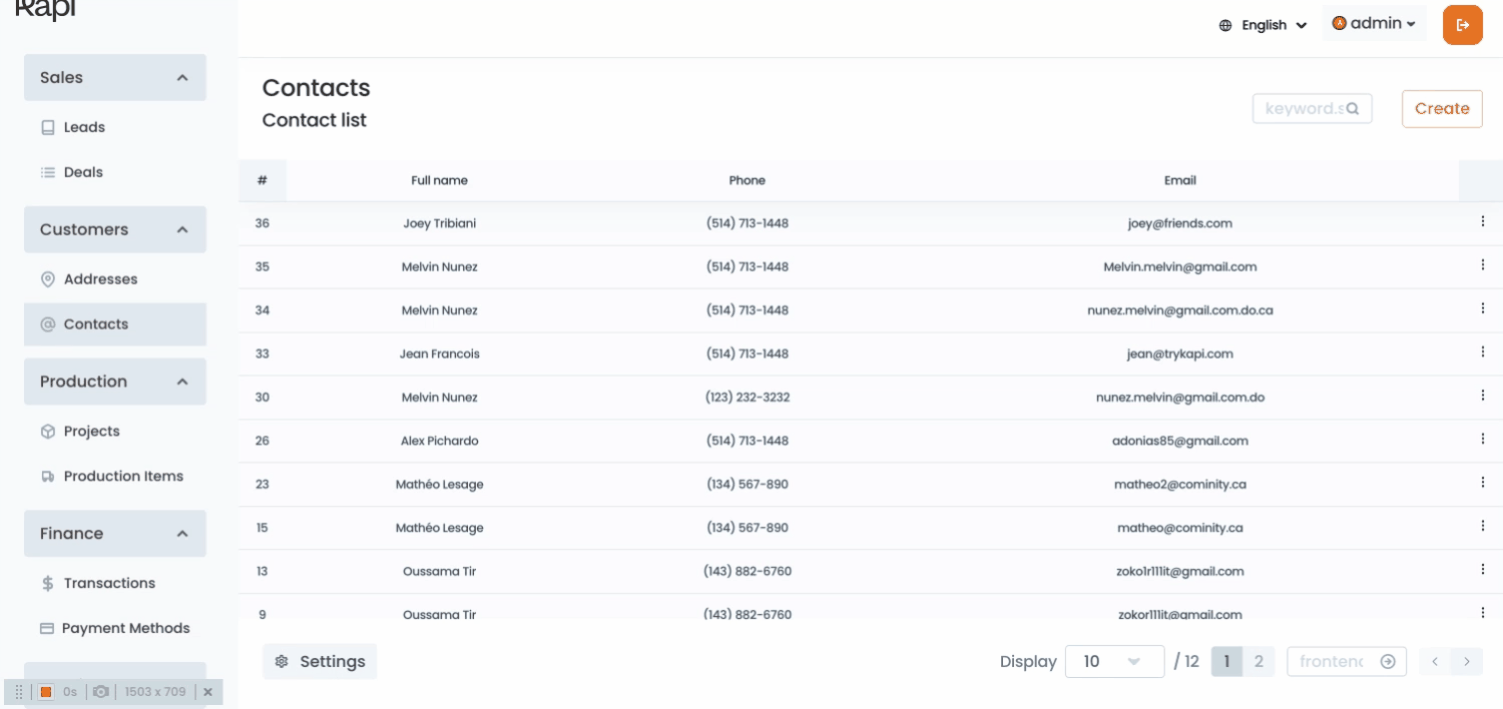
You can click on one of the records shown in the grid.You can use the search bar to locate a contactTo use the search bar you need to type the name, email, or any value that will help you find the record of the contact you want to edit.A list of records matching your searching criteria will be shownSelect the desired record by clicking on it.When you click on a record you will be redirected to the contact’s profile page. This is a page where you’ll be able to see all the data related to the selected contact.Within this page you’ll see 2 actions button located in the left side of the screenEdit: will enable the Contact’s information fields and will make them editableYou can make the desired changes and click on the save button.You can cancel the changes and the data will remain the same.Delete: this option will allow you to delete the Contact.A modal will prompt asking if you’re sure about deleting the ContactYou can confirm your decision by clicking the delete button.A notification will be shown, informing the Contact has been deleted.You can cancel the action by clicking the cancel button.
NameLastnameBirthdayEmailPhoneLast updated date / Created date.
within this tab you’ll be able to see all the project’s created under this contact.You can navigate to the project’s details by clicking on the project’s rawYou will be redirected to the project’s profile page.
You can navigate to an address profile page by clicking on the raw containing the address.
Within this tab you’ll be able to see which business addresses are assigned to this contact.You can navigate to the business address by clicking on the record.
within this tab you’ll be able to see all the payments done by this contact.For now you’ll only be able to see the Payment ID and the amount.
Kapi - Documentation
- Pages
Contacts
How to create a contact
It all start by going to the contacts page, you can get to this page by clicking on the “Contacts” section from the main menu.
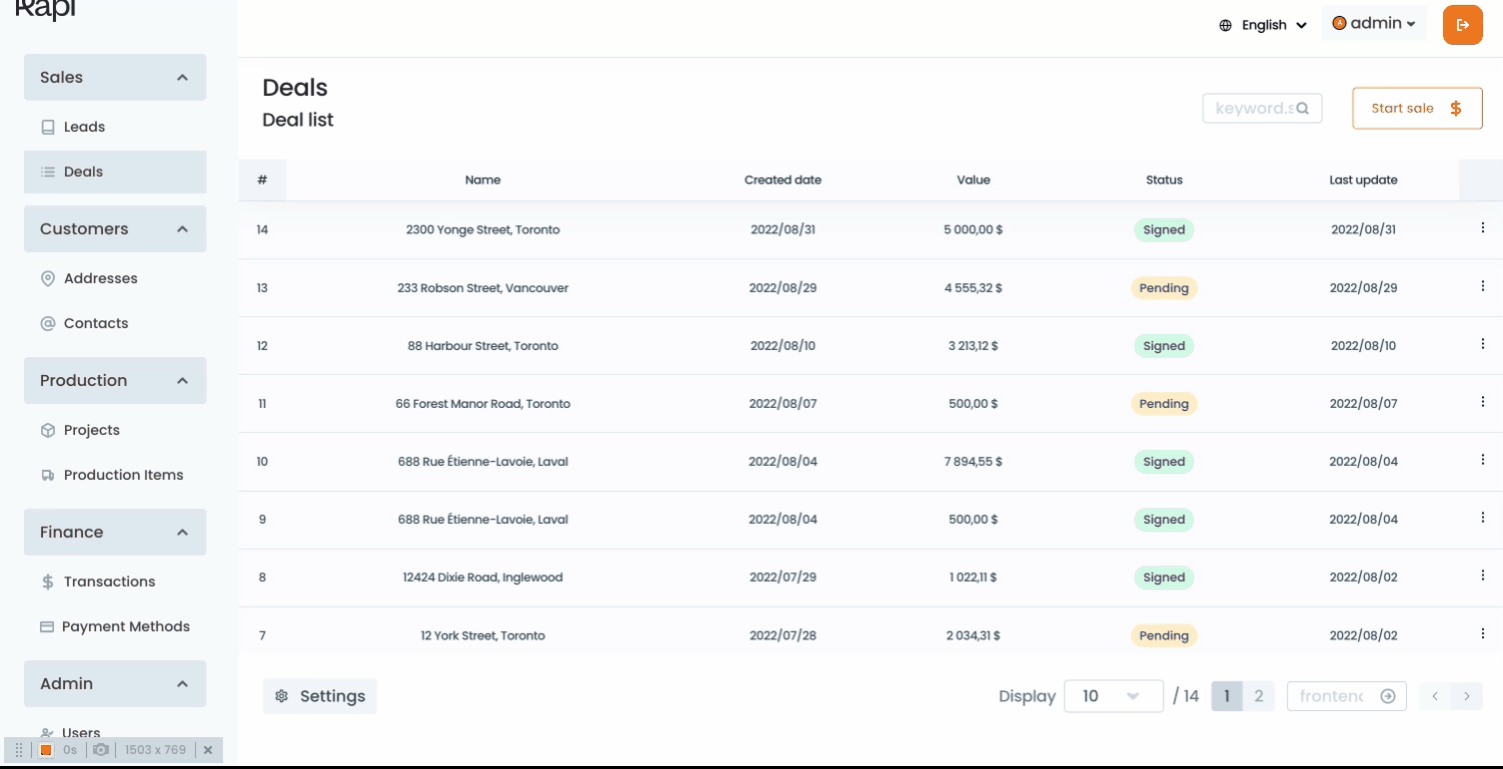
In this page you’ll be able to see a list of all the existing contacts, to create a new contact you must:
How to create a contact - 2nd option
It all starts with the sales workflow explained in the document. After a deal is generated with a new email, the system will create a new contact with the provided details for the customer.
How to edit contacts
It all start by going to Contact’s page, then you must locate the contact you want to edit. A list of existing Contacts will be shown within this page. You can navigate through the shown records and click on the one you one to edit.
Understanding contact’s information
It all starts by going to a contact profile page, once you’re in this page you will see:
Contact’s general information:
Projects
Addresses
Within this tab you’ll be able to see all the addresses related to this contact, meaning a deal was made using these addresses.
Business
Payments

Want to print your doc?
This is not the way.
This is not the way.
Try clicking the ··· in the right corner or using a keyboard shortcut (
CtrlP
) instead.